
How to Integrate codeREADr with PassNinja

Updated August 12, 2026
TL;DR: Validate PassNinja wallet passes on NFC terminals with codeREADr.
- 1. Create a validate Application on the pass template you want to scan.
- 2. Create a reader bound to that Application — its token is your codeREADr secret.
- 3. Create a Service in codeREADr configured for Postback validation.
- 4. Attach the secret, then authorize users and assign reader devices.
- 5. Tap a pass to test, then confirm the result mapping before going live.
PassNinja has partnered with codeREADr as its wallet pass NFC validation provider. Once connected, staff tap an Apple Wallet or Google Wallet pass issued by PassNinja against a codeREADr-compatible terminal (built on VTAP or Zebra hardware) and get an instant valid/invalid result — enforced by whatever redemption policy you configure (one-time use, a rescan window, multiple taps). Every tap is a request to PassNinja: we decide accept or reject, and codeREADr shows your staff a color-coded result. This guide walks through both sides of the setup.
How it works
codeREADr's app or terminal reads the pass over NFC, then POSTs the scanned value to a PassNinja endpoint (/v1/integrations/codereadr/postback) along with a shared secret identifying your reader. PassNinja looks up the pass, applies your Application's redemption policy, and responds with XML codeREADr understands:
<?xml version="1.0" encoding="UTF-8"?>
<xml><message>
  <status>1</status>              <!-- 1 valid · 0 invalid · -1 connection error -->
  <text>Accepted</text>
  <scan_display_config>{"status_title_default":"Valid","status_color_default":"#1f9d55"}</scan_display_config>
</message></xml>
| Scenario | <status> | Result shown |
|---|---|---|
| Valid pass, first scan | 1 | Green — "Valid" |
| Same pass again (inside the rescan window) | 0 | Red — "Already used" |
| Pass not installed, expired, or inactive | 0 | Red — "Not valid" |
| Value doesn't match any pass | 0 | Red — "Unknown pass" |
| Bad or missing secret | 0 | Red — "Not authorized" |
How to create a validate Application
An Application defines what happens when a reader scans a pass on a given template. For NFC validation, you want kind=validate.
From the dashboard:
- Log in to your PassNinja dashboard and go to Applications in the left nav.
Note: The Applications and Readers nav items only appear if your account has the
scan-events-systementitlement. If you don't see them, reach out to PassNinja to enable it on your plan.
- Click New Application.
- Set Kind to
validate, choose the pass template you want to scan, and set a rescan window — how long before the same pass can scan again. Use a large value (e.g. 86400 seconds / 1 day) for true one-time-use tickets. - Click Create.
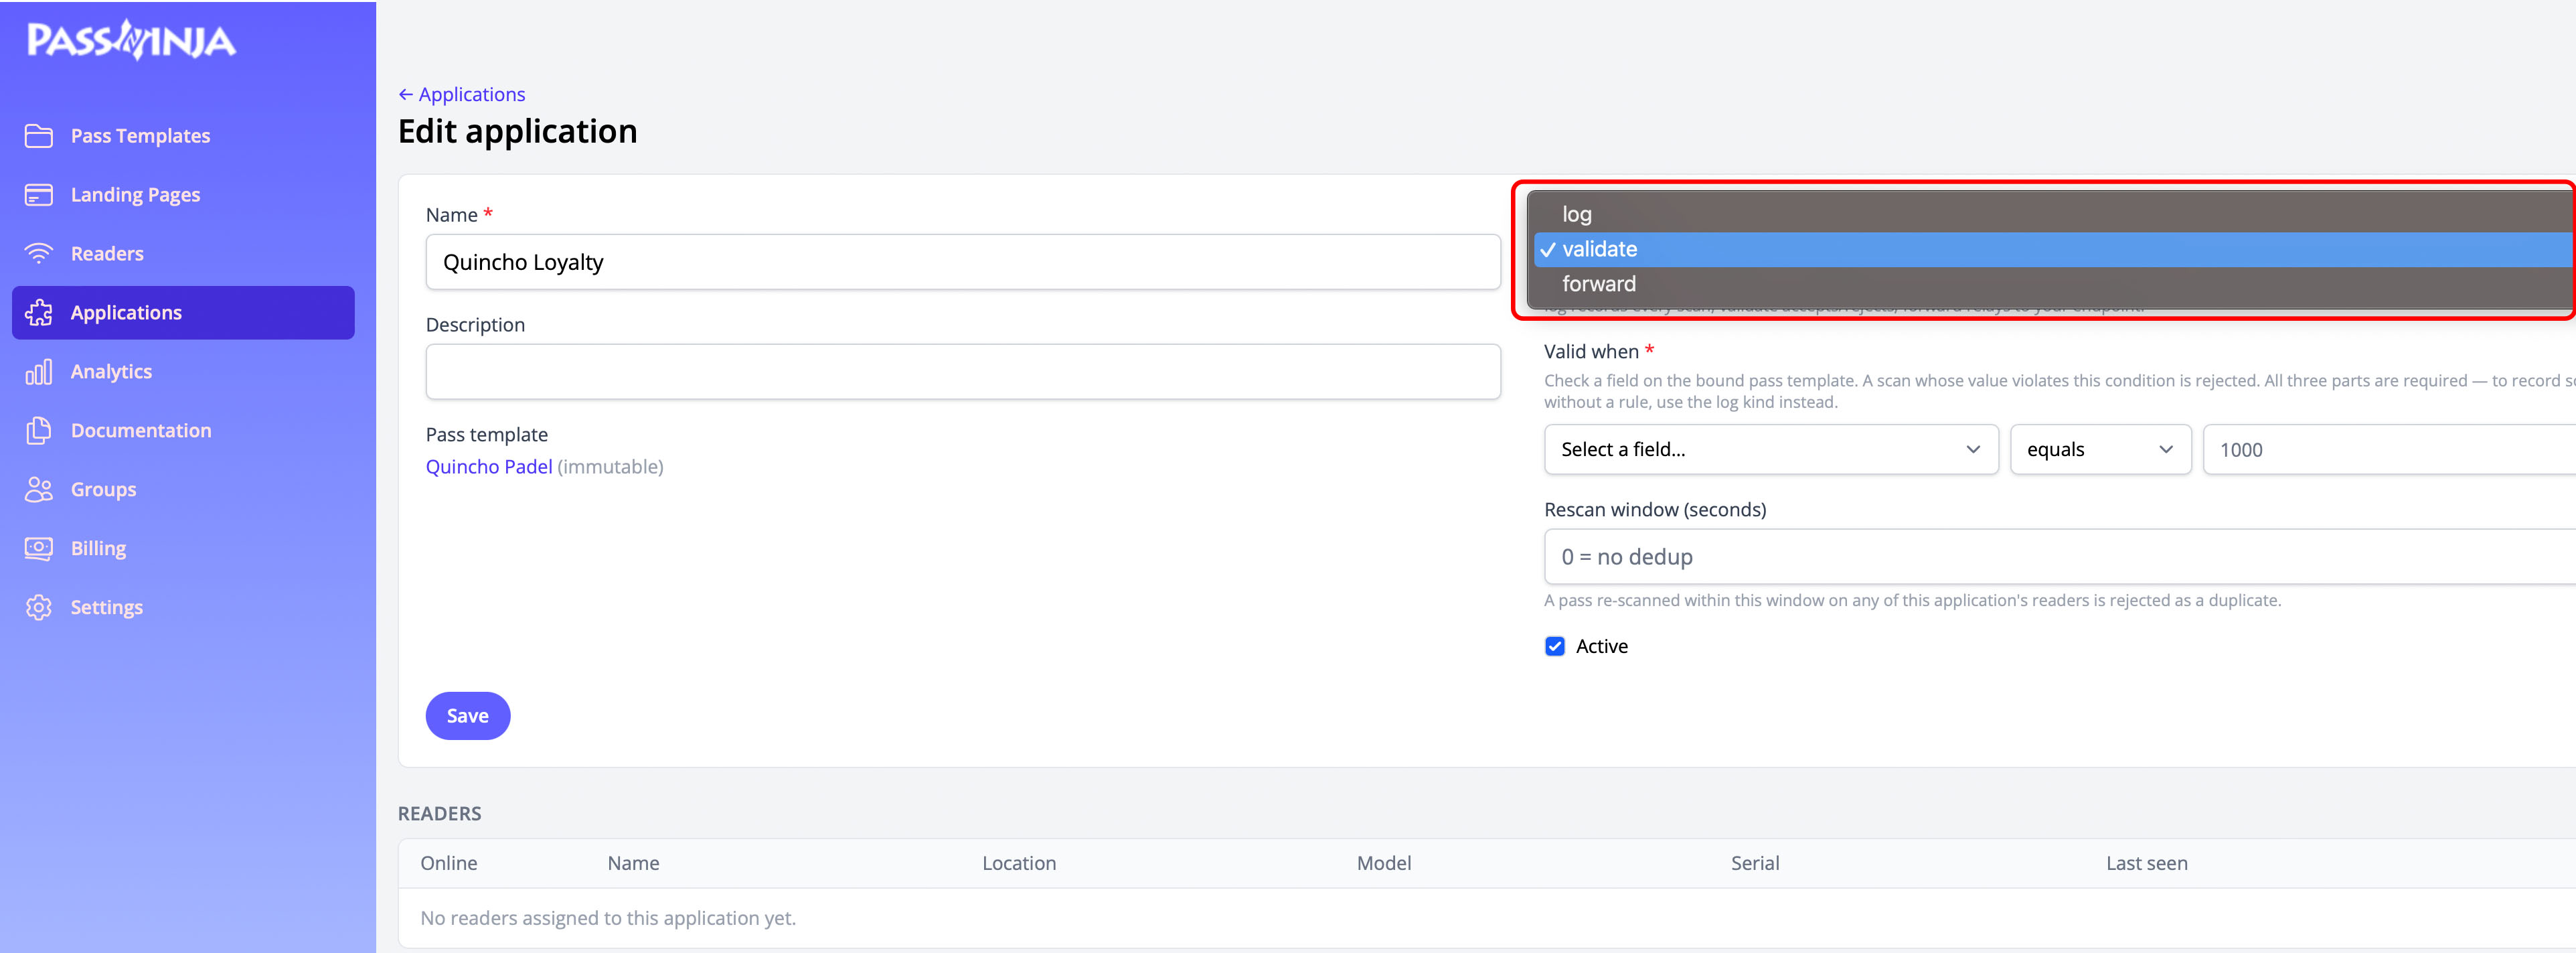
From the CLI, if you have the passninja CLI installed and authenticated (passninja auth):
passninja application create \
  --name "codeREADr gate" \
  --kind validate \
  --pass-template ptk_0x... \
  --rescan-window 86400
This prints the new Application's ID (app_0x...) — you'll need it for the next step.
Note: A template can only be paired with a reader while it has zero live issued passes. If your template already has passes issued on it, this step happens before you issue any, or the pairing will be rejected with
TEMPLATE_HAS_ISSUED_PASSES.
How to create a reader and get your codeREADr secret
A reader's bearer token doubles as the codeREADr secret — creating a reader here is the only step left before you configure codeREADr.
From the dashboard:
- Go to Readers in the left nav and click Add a reader.
- Fill in a Name and Location, then check the Application you created in the previous step.
- Click Add reader.
- Copy the token shown on the confirmation screen — it starts with
rdr_...and is shown exactly once. Store it somewhere secure (a password manager, not chat history).
From the CLI:
passninja reader create \
  --name "Front gate" \
  --location "Main entrance" \
  --application app_0x...
The response includes the token (rdr_...) exactly once — save it immediately, it can't be retrieved again (rotate it with passninja reader rotate-token <reader_id> if you lose it).
The Postback URL is always https://api.passninja.com/v1/integrations/codereadr/postback — both values go straight into the codeREADr Service you'll create next.
How to create the codeREADr Service
This part happens entirely in codeREADr's own dashboard — see their guides on choosing a service type and postback scans for the full walkthrough with their own screenshots. The short version:
- Log in to your codeREADr dashboard.
- Click Services in the left nav, then New Service.
- Choose Scan to a Third-Party Server.
- Fill in the Service configuration:
| Setting | Value | Why |
|---|---|---|
| Validation method | postback | Sends each scan to PassNinja for validation |
| Postback URL | the URL PassNinja sent you | Where scans are POSTed |
| Postback receiver only | No (0) | codeREADr must receive and honor our valid/invalid answer |
| Postback real-time scans | Yes (1) | Validates live, not in a later batch |
| Direct scan (DSU) | On for app-to-PassNinja direct, Off for codeREADr to relay + keep its own log | Pick based on whether you want a scan log on codeREADr's side too — see their DSU guide |
Receiver-only and real-time-scans live under the Service's Advanced Settings.
- Save the Service.
How to attach the secret
- On the Service you just created, go to Scan Properties.
- Add a property named
secretwith therdr_...token from the reader you just created.
codeREADr sends this property on every scan. It's how PassNinja knows which reader made the tap, and therefore which Application — and which redemption policy — to apply.
For how scan_properties are actually passed through on a scan, see codeREADr's Postback URL and DSU Variables guide.
How to authorize users and assign devices
Also entirely on codeREADr's side — their add a user and device requirements guides cover this in full:
- Under the Service, go to Users and authorize the app user(s) who'll be scanning.
- Go to Devices and assign the reader device(s) running the codeREADr app.
- Configure the symbology / decoder settings for the certified VAS or Smart Tap NFC read (this depends on your terminal hardware — VTAP and Zebra both publish their own decoder reference).
How to test before going live
You don't need a physical device to confirm the PassNinja side is wired correctly — simulate exactly what codeREADr sends with curl:
curl -s -X POST "https://api.passninja.com/v1/integrations/codereadr/postback" \
  -H "Content-Type: application/x-www-form-urlencoded" \
  --data "secret=rdr_your_secret&value=your_pass_serial"
A valid, unscanned pass returns:
<?xml version="1.0" encoding="UTF-8"?><xml><message><status>1</status><text>Accepted</text><scan_display_config>{"status_title_default":"Valid","status_color_default":"#1f9d55"}</scan_display_config></message></xml>
Run the same request again and you should get Already used instead — confirming the rescan window is enforcing one-time use.
Once that checks out, do one real tap on the terminal and confirm the green/red result on screen matches.
How to check account prerequisites
- Paid plan on codeREADr — API testing works on their free tier; production traffic needs a paid plan.
- IP allowlists — exchange IP ranges with PassNinja if either side restricts inbound traffic: codeREADr's postback egress IPs (Account → Postback Integrations page in their dashboard) and PassNinja's outbound IPs if you call their API directly.
- Certified reader hardware — a VAS/Smart Tap-certified NFC terminal (VTAP or Zebra). This is a hardware requirement from Apple/Google, not a codeREADr or PassNinja gate.
Conclusion
Once connected, every tap on a codeREADr terminal becomes a real-time decision made by PassNinja: valid, already used, or not valid, enforced by whichever redemption policy you set on the Application. The setup lives entirely in configuration — a validate Application on your template, a Postback-mode Service in codeREADr, and the shared secret between them — so there's no code to write on either side. Test with curl before your first live event, and confirm the rescan window matches how you actually want reuse handled (a single gate scan vs. a loyalty card tapped every visit).